Psychosocial Risk Factors & Musculoskeletal Disorders
 Psychosocial Risk Factors
Non-physical aspects of the workplace developed through workplace culture, policies, expectations, and the social attitude of an organization (CCOHS, 2017).
Includes both objective demands and subjective assessment of a worker’s ability to perform the demands. When workplace psychosocial risk factors place demands on workers that are greater than their ability to cope, they will experience stress. Stress can contribute to poor mental and physical health which can contribute to the development of musculoskeletal disorders (MSDs) (CCOHS, 2017).
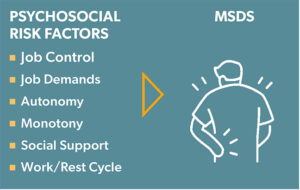
Examples of Psychosocial Risk Factors
- Job Demands: mental and physical requirements of the job (i.e., time pressures)
- Job Control: the amount of perceived input a worker has over the way their work is performed (i.e., limited opportunity to make their own decisions).
- Job Satisfaction: task variety, monotonous work
- Support: workers perception of the support they are receiving from co-workers, employer, and family.
- Work/Rest Cycle: adequate physical and mental recuperation time.
The Body’s Reaction to Stress
The body has a “fight or flight” reaction in response to the stressors placed upon it. Stress can be positive or negative and the body undergoes three different responses to stress:
 1.Behavioural Response
Responses produced by an individual that they are unaware of. For example, an individual may avoid the workplace (increased sick days); use excessive force when performing tasks, etc. These responses can increase the risk of developing MSDs.
2. Psychological Response
General response based upon how the stress is perceived by the individual (positive or negative). In the workplace negative stresses may be linked to the psychosocial factors.
3. Physiological Response
How the body naturally reacts to stress. These responses include increased blood pressure; muscle tension; decreased sensitivity to pain; and increased release of cortisol (the body’s primary stress hormone). The body’s physiological response may cause people to lift heavier material, work quickly, and work beyond their body’s physical capacity.
How do Psychosocial Risk Factors Contribute to MSDs
When workplace psychosocial factors place demands on workers that are greater than the worker’s ability to cope with them, they experience stress.
1.High mental load and work demands may:
- Increase muscle tension
- Decrease the frequency of breaks leading to muscle fatigue.
- Change the immune response so recovery is affected
- Directly impact force applied and postures assumed (i.e., striking keys harder, gripping tighter).
2. Muscle Activity
- High work stress may increase muscle activity and load on the musculoskeletal system. It may also reduce an individual’s ability to relax which may lessen muscle recuperation during breaks and after work.
3. Stress responses may:
- Cause physiological changes that may lead to musculoskeletal problems.
- Lead to different perceptions of the work situation and musculoskeletal symptoms.
- May result in acute or short-term pain becoming long lasting musculoskeletal pain.
4. Increased sensitivity
- High work stress may lead to changes in the central nervous system causing increase sensitivity to pain.
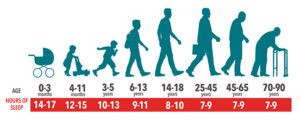
5. Sleep
- Sleep disturbances leading to inadequate mental and physical recovery can result.
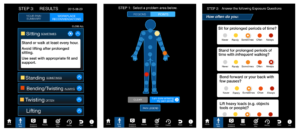
How to Assess Psychosocial Risk Factors
OHCOW has resources and tools to assist workplaces in assessing and preventing workplace mental harm. Find them here.

Stress Assess
OHCOW also offers StressAssess, a free evidence-based online survey tool, designed to assist workplaces in identifying psychosocial hazards that can lead to stress and mental injury. www.stressassess.ca
Strategies to Help Control Psychosocial Risk Factors in the Workplace
- Encourage employee participation and decision making
- Clearly define employees’ duties and responsibilities
- Promote work-life balance
- Encourage respectful behaviour
- Manage workloads
- Provide training and learning opportunities
- Promote conflict resolution practices
- Recognize employees’ contributions
When Workplaces Manage Psychosocial Risk Factors and Support Employee Mental Health the Following Generally Occurs:
- Improved employee morale
- Reduced absenteeism
- Reduced injury costs
- Increased productivity

 Back to School:
 What can caregivers and educators do?
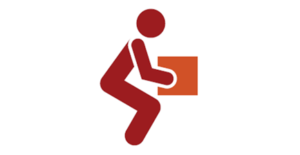
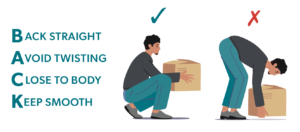 2. Lifting/lowering and carrying
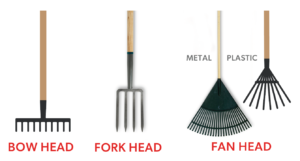


 Select the right shovel: